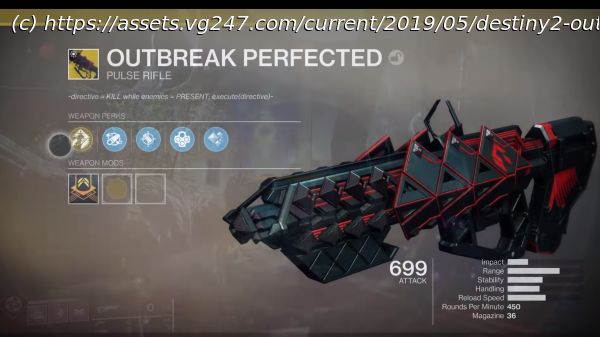
The Outbreak Prime Exotic pulse rifle was added to Destiny 2 last week as the revitalised Outbreak Perfected and it comes with quite the challenging questline. Once you’ve earned Outbreak Perfected, you’ll be able to gather SIVA Particulates and get the Outbreak Perfected Catalyst, a perk which increases nanite damage. You’ll need 500 Precision kills…
The Outbreak Prime Exotic pulse rifle was added to Destiny 2 last week as the revitalised Outbreak Perfected and it comes with quite the challenging questline.
Once you’ve earned Outbreak Perfected, you’ll be able to gather SIVA Particulates and get the Outbreak Perfected Catalyst, a perk which increases nanite damage. You’ll need 500 Precision kills and 500 SIVA Particulates in order to complete the Catalyst.
There’s an additional quest you can do that will speed the process up a bit, and you’ll get a ship as an extra reward, but it’s no easy feat.
You’ll want to be a minimum of around 690 power for this mission and it would be handy if you had a weapon like Arbalest with you, which you should have picked up during The Revelry.
To begin this quest, you first need to find the Fallen Transponder. Head to Titan and begin the Bad Neighbours Heroic Adventure near Tidal Anchor and battle your way through until you reach the first Shrieker. Kill it then look for a door on the left with the “unlocked” prompt.
If the door is locked, you’ll need to go and finish the Enemy of my Enemy quest on Titan before you can head inside.
Once inside, you’ll find the transponder on the table at the bottom of the stairs.
The quest will update and you’re looking for six nodes across the map. Four of the nodes can be found in the EDZ, with the rest found on Nessus.
The first one can be found in The Drain Lost Sector in the EDZ. Kill the captain and run past the chest until you enter a giant cavern.
You’ll find the first node between crates covered in purple sheets, and you’re looking for a prompt to collect node data.
For the second node, head to the pit in the Whispered Falls Lost Sector in the EDZ. On your right, you’ll see a green light. With your back to the skulls, look around and you’ll find the second node.
The next node is in the Atrium Lost Sector. Clear the first room of Fallen then stick to the left when you go out the door. The third node can be found behind a pillar in the alcove.
Head over to the Widow’s Walk Lost Sector for the last EDZ node. Clear out all the enemies then walk up to the chest. There should be a small landing near the dilapidated building, so jump up to find the node.
For the next two nodes, you’ll be heading to the Carrion Pit and The Rift Lost Sectors respectively. The first node can be found after you kill the boss. Jump down to the right of the chest, turn around then jump over the hidden wall to find the fifth node.
The sixth node can be found near the giant red light. Face the light and turn to the left to see a storage container hanging off a ledge to find it.
Once you’ve collected all the nodes, head back to The Farm. Get a good Fireteam together, go to the barn and head into the cellar until you find Mithrax, the Fallen captain. He’ll give you a mission called Zero Hour, so get ready to grind.
There’s a 20-minute timer for this mission, so make sure you’ve got your best weapons and that all Fireteam members are at least 680 Power.
You’ll be defeating rounds of enemies in order to unlock doors, so bring weapons such as Arbalest that make short work of enemy shields and heavy weapons, such as grenade launchers, for larger enemies.
Once you’ve gone through the vent at the bazaar, you’ll reach the Speaker’s chambers. Clear out the enemies and go through the hallway until you reach the courtyard. You’ll reach an area that’s filled with Shanks, so take out the ones with shields first.
After that, you’ll reach the Hangar and there will be a Walker, some snipers and a Servitor. After this, carry on through the scaffolding and slide under the door near the M and jump down the lift shaft and into the vent.
You’ll eventually reach a shipyard, so follow the path around the ship nearest you until you reach another vent. Once you’ve dropped into the hallway, follow it around and then jump into the vent above you. Stray left and enter yet another vent behind a toolbox.
Once in this vent, keep going until the first right turn. Go through the doorway directly under you, step off the ledge, turn around and push forward against the wall as you fall. You’ll see a ledge you can climb which leads to another vent.
You’ll see that you’re no outside the Tower. Jump onto the scaffolding until you see two drain openings and a platform on the left, which you’re aiming for. Once on it, you’ll see a small ledge down below.
Land on this, look out towards the Traveller and turn left. Jump on the pipes and keep going until you reach the next landing, where you’ll find a switch which will help your friends reach you faster.
Home
United States
USA — software Destiny 2: Outbreak Perfection guide – how to solve the elemental configuration...


