Engineered for detail. Designed for mobility
Thermal Master P3: 30-second review
Thermal imaging has come a long way from bulky, industrial-grade gear to sleek, smartphone-powered tools. The Thermal Master P3 is a prime example of that evolution. Building on the success of its predecessors, particularly the ultra-compact P2 Pro, the P3 refines the formula with sharper resolution, manual focus, and a more tactile, professional-grade build. It’s a device that doesn’t just fit in your pocket; it earns its place in your toolkit.
At its core, the P3 is a plug-in thermal camera designed for Android and iOS devices, offering a native 256×192 infrared resolution that can be digitally enhanced to 512×384 using the brand’s X³ IR software. That’s a notable leap from the P2 Pro’s fixed-focus setup, which, while impressively portable, lacked the precision needed for close-up diagnostics. The addition of manual focus and a macro lens transforms the P3 into a serious contender for professionals who need more than just a thermal snapshot.
The build quality also marks a shift in tone. Where the P2 Pro leaned into minimalism with its featherweight plastic shell, the P3 opts for an aerospace alloy body that feels solid and premium without sacrificing portability. It’s still light enough to carry anywhere, but now rugged enough to survive the kind of environments where thermal imaging is most useful.
So who’s this for? The P3 is ideal for engineers, HVAC technicians, electricians, and anyone working in diagnostics or maintenance. It’s particularly well-suited to electronics professionals who need to spot micro-heating anomalies on PCBs, thanks to its macro lens and manual focus. It’s also a smart pick for field inspectors who want a reliable thermal tool without the bulk or battery anxiety of standalone imagers.
In short, the Thermal Master P3 isn’t just an upgrade — it’s an evolutionary step. It takes the portability of the P2 Pro and adds the kind of precision and build quality that professionals demand. If you’ve been waiting for a thermal camera that’s as serious about detail as you are, the P3 might be the one to beat.Thermal Master P3: price and availability
Thermal Master P3 offers one of the best balances of resolution, manual focus, and build quality at the $299 mark. It’s available direct from the Thermal Master official site here.
At that price, it is comfortably below flagship models like the FLIR One Pro, yet offers superior thermal resolution and control. While it lacks a visible light overlay and requires sideloading on Android, these trade-offs are minor compared to the imaging clarity and build quality it provides.
It can be bought on Amazon.com, but the price there is the MSRP of $349.
The Thermal Master P2 Pro is cheaper and more portable, but the lack of manual focus makes it less suitable for detailed inspections.
I’d position the P3 as a mid-range powerhouse that punches above its weight in precision and build quality, especially for professionals in electronics and HVAC.
Value score: 4/5Thermal Master P3: SpecsThermal Master P3: Design
Tiny camera
PC and phone
50mK NETD
If cuteness played a part in this evaluation, then the P3 would score highly.
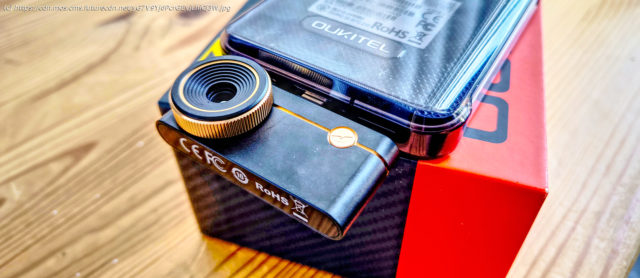
This tiny camera measures just 59mm across, is 27mm high, and only 17.2mm thick, with most of that thickness being the length of the lens.
There is only a single control on it, that being the twisting lens to focus, everything else is done from the phone or PC app.
What’s less endearing is that the thermal sensor is exposed, as Thermal Master didn’t include a lens cap for this device. What you do get is a soft carry case that includes a short 27mm adapter to use it with an Apple Lightning connector.
Included in the box is a longer, 45cm cable that connects the P3 to a PC using either USB-C or USB-A. Disappointingly, those at Thermal Master responsible for creating the soft carry case weren’t informed about this cable, and it won’t fit with the camera in the case.
That’s annoying, and another consideration is that using it with a Laptop or desktop PC means there’s no tripod or other way to position it without holding the camera.
If you are using this device to analyse a motherboard for hot spots, you’ll need to rig something temporary up, or print your own mounting system with a 3D printer.
Those using it with a phone might also have issues, since the USB-C blade on the camera is deeper than some phone ports, causing a gap between the two. Obviously, since it’s USB-C, it is possible to put the camera in either facing the user or away, but as it’s necessary to see the screen, away is the most useful.
Домой
United States
USA — software I reviewed this tiny thermal camera and I'm shocked by what it...


