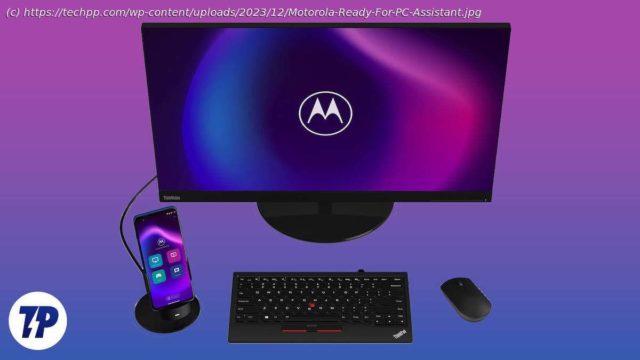
Master the art of using Motorola Ready For with your PC. Our complete guide will show you how to seamlessly integrate and maximize this powerful feature.
Motorola has been making some great smartphones lately. They are right on trend with their approach to delivering a clean Android experience with great performance and sometimes even segment-class features. Whether it’s 12GB of RAM and 256GB of storage for under $220 or the Moto Razr with a folding display, Motorola is doing great in the market, and we’re excited.
One of Motorola’s greatest strengths is the clean, no-nonsense, and stock Android UI, MyUX, that comes with every Motorola device. But a clean and nearly stock Android experience doesn’t mean it’s lacking in features. It has some great personalization features and some neat gesture tricks up its sleeve. In this blog, we’ll discuss one of those features, Motorola Ready For.
Table of ContentsWhat is Motorola Ready For
Motorola Ready For is Moto’s realization of transforming a smartphone experience into a full-fledged desktop experience by connecting the phone to a display. It seamlessly transforms from a phone interface to a desktop-like interface for better productivity or entertainment, but that’s only half the story.
Motorola has also developed a PC assistant for Motorola Ready For that allows your Moto device to connect to your PC or laptop with a USB-C cable or wirelessly, allowing you to access your smartphone in a dashboard environment.
Here, you can access numerous cross-platform Android and Windows features, such as app streaming, mobile desktop, screen sharing, using your smartphone as a webcam, and much more. All of these features work when your smartphone is connected to your Windows PC/laptop with a cable or wirelessly.
In this article, we’ll focus on the “Ready for PC Assistant” part, how to connect and configure your Moto device with the Motorola Ready for PC Assistant, and the different features Ready for offers and how well they work.
First, let’s take a look at what you need to do to get started with the Motorola Ready For PC Assistant.Pre-requirements for using Motorola Ready For with PC
You need to have a few things with you if you want to use Ready For to its full potential. While some of the things are not absolutely necessary, there are 2 things that you absolutely must have in order to use Ready For, and those are:
You need a compatible device from the Moto G or Edge series. To check your smartphone’s compatibility with Ready For, you can visit the Moto Connect website and view the compatibility list.
Pay attention to the “Ready For” column. It is compatible if your device is mentioned and has a checkmark. If it has a cross, it is not compatible. If your Motorola smartphone is not listed, try installing the Ready For app from the Google Play Store if it is not pre-installed on your smartphone. If the Ready For app is installed successfully, you can use Motorola Ready For without any problems.
You need a Windows PC or laptop with Wi-Fi and Bluetooth to connect your device wirelessly. If your PC/laptop does not have Bluetooth or Wi-Fi, you can only use Ready For by connecting your Moto device with a USB cable. It is also advisable to update the Wi-Fi and Bluetooth drivers beforehand to avoid unnecessary errors.
A USB cable is a necessary part of the process, as you will understand later in the article. We believe it’s best to stick with a USB cable that came with the phone, but you can also use a different and high-quality USB-C cable, as we did in our case.
Once you’ve checked the compatibility of your device and your Windows PC/laptop is ready, it’s time to configure and set up Motorola Ready For on both the PC/laptop and the smartphone – so here we go.Motorola Ready For: Installation on PC and Phone
The first step in configuring Ready For is to install Ready For on your smartphone if it is not already installed. On most Moto G series devices, this is not the case, and you will need to install it from the Google Play Store, while on a Windows PC/laptop, you will need to install the Ready For PC wizard from the Windows Store, and yes, you will need an activated Windows 10 or 11 for this. Let’s take a look at the installation process on Android.
On most flagship Moto devices, Ready For is already installed, and you can start configuring it, while on most budget or mid-range Motorola devices, you will need to install the Ready For app from the Google Play Store and start the initial setup.
Here is how you can install the app from the Google Play Store
Open the Google Play Store and search for Motorola Ready For.
Open the listing shown in the image below.
Install the Ready For app.
If the Ready For app is already installed on your Moto device and needs to be updated, you can also simply update it.
To use Motorola Ready For on your PC/laptop, you need to install the “Ready For PC Assistant” from the Microsoft Store. Here are the instructions:
Open the Microsoft Store on your Windows device.
Search for “Ready For Assistant” in the search bar.
Here, click on the listing that is shown in the image below.
Click on Get and then hit Install.
Once you have installed the Ready For app on your phone and the Ready For PC Assistant on your PC/laptop, it’s time to set up and configure Ready For.Setting Up Motorola “Ready for” on Windows and Android Wirelessly
Let’s start with the configuration of Motorola Ready For on Windows and then continue with the Android configuration. Once the Ready For PC Wizard is installed on the PC/laptop, we need to follow these steps to set up Ready For wirelessly.
Open the app and click “Get Started” at the bottom of the app window.
Then it will prompt you with multiple Windows, stating Ready For features. You need to hit the next button on all of the Windows.
On the last Window, you will see a QR code, and the app window will prompt you to connect your device.
Now, it is time to set up your Android device. You may leave this app window open for the time being and jump to your Phone.
To set Motorola Ready For on Android, start by following these steps:
Open the Ready For app on your Motorola device.
The app will show you some useful information about Motorola Ready For. You can read it if you want or click on the Next button in the bottom right corner.
Then, you will see the welcome screen with 2 options to connect your phone to a PC or tablet.
Here, you will see a QR code scanner in the top right corner.
Click on it and scan the QR code that appears on your laptop or desktop as described above.
Once you have scanned the QR code, a small window will appear on your phone where your phone will try to connect to your Windows laptop or PC.
Once connected, you will see a connection to your computer, and you will see the status of your computer as online or offline, with several options below, and this also applies to your PC/laptop.


